Friday 4 January 2013

DIY Gift: Vow Art

Yesterday you heard about my date jar gift to Philip, and so today we'll be talking about the homemade gift that I received from Philip. While it is Friday and Philip is the typical author of today's post, he's busy enough writing the drama for our church's dinner theater (at Eastview around Valentine's Day if you want to mark your calendars), so I'm taking this one for the team. I won't try to incorporate him in this post with a painting like I did my date jar yesterday (phone randomly fixed itself, so there is an actual photo over there today!)

When preparing to write this post he emailed me everything I'd need to know about how he came to make this beautiful craft, and so hopefully I can do it justice.

After seeing some great pieces of art that featured wedding vows or other wedding memorabilia, I had been hinting pretty heavily that I'd like something similar. Here are a few of the pieces that I had shown to Philip but didn't want to buy because I knew Philip could easily make something amazing and it would be more meaningful than buying it off Etsy.


I heart this personalized print from Silhouette Blue.


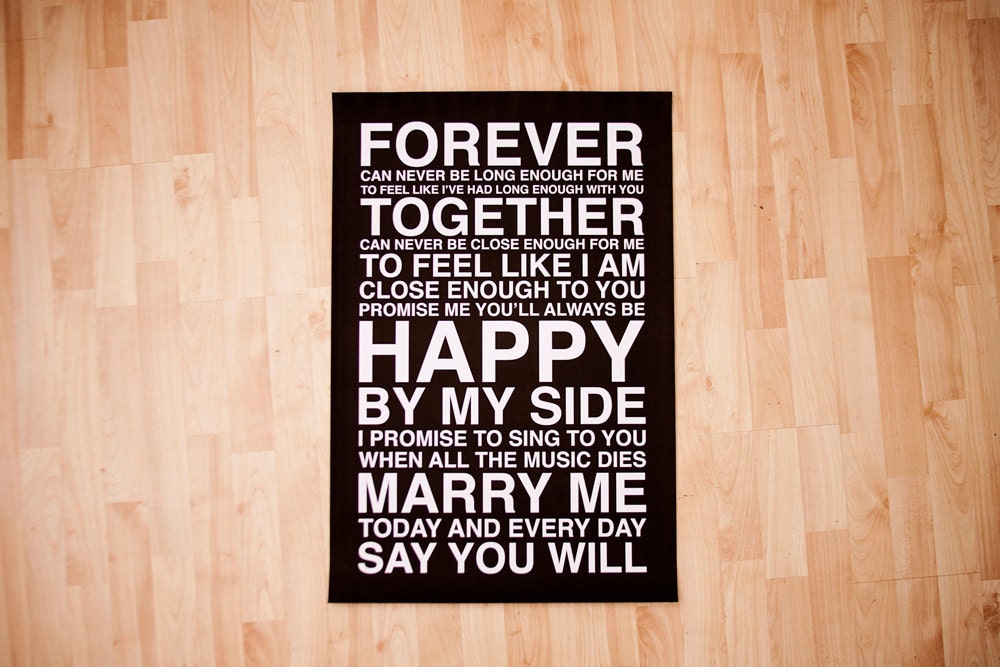
While I don't need Train lyrics on my wall,
 I like the graphic feel from Alexander Creative.
I really love the idea of personalized art (I think I've mentioned that before), and so it was really thoughtful of Philip to take that into consideration and make me an amazing Christmas gift.

Philip started with a completely different idea than what he ended up with. Beginning with an owl inspired (due to the owl trend that's invading the stores these days - and I might have allowed it to come into our house a bit) piece. 

While this is really cute,
I'm so much happier with what Philip ended up with!

The goal with the owl artwork was a layered and textured feel, looking custom and professional, but also really cute and fun. It didn't work out because pencil crayon on black construction paper didn't work as well as Philip had hoped, and the owls ended up looking a lot more juvenile (although I do still love the owls that he made and will definitely hang them somewhere) than what the content would call for. 

I'll still give a bit of a run through on how to make the artwork above, if it's your groove.

Philip started by printing the vows and adhering them to black construction paper with Post-Its (so that the construction paper wouldn't be damaged when it was removed). This way he could trace the letters onto the construction paper below to achieve the font and look he'd planned. 

An innovative use of Post-Its. 

Philip had designed the owls ahead of time on the computer so he had a plan when it came time to craft.


Cutie owls, I do still really like them!

After creating the owls virtually, cutting them out of construction paper in layers was a lot easier and well planned out. It turned out so adorable! I can't wait to hang them up. Have I mentioned how talented my husband is? I couldn't make that on the computer, and I'm definitely not a master of using scissors, can't even imagine how long it would take me to make that tree trunk out of the different papers, let alone the owls. 


The most beautiful construction paper craft I've seen to date.


These owls get their close up.
Anyway, this craft didn't work out for reasons mentioned above, and overall Philip just didn't like how it was looking. So he moved on to another plan, which took about the same amount of time as this failed attempt.

Philip changed to a simpler design, one that he found airy and knew would look great in the white matted white frame that he'd purchased, as well as on any of our wall colors. He went with the colors from our wedding invitations, yellow and grey, because it was definitely a reminder of our beautiful backyard wedding. 

He started similarly to the owl print, by getting the text onto the paper he wanted to use. That's one thing I really appreciate about the artwork he made, he could have easily printed it off the computer, but he hand wrote everything. 

Philip wrote our vows in a heart shape, the left side with my vows and the right side his.  (In the background you can see how he made a light table out of a reading lamp propped up under our glass desk.)
Philip wrote our vows in a heart shape (you can kind of see that above), the words were written in yellow, with the verbs in grey. The left hand side are my vows to him, and the right side are his. Then at the bottom he included our wedding date, August 6, 2011. I have wanted to have our vows framed somewhere in our house for a while, I like the idea of seeing our promises each day and using them as accountability and reminders of what we want for our marriage. 

Philip then cut them out, into two separate heart halves, and glued it on to yellow construction paper, in order to make it a little bit more 3D, similar to the effect that was meant with the owl art. 

All done, just needed to cut the mat.
After finishing up, Philip cut the mat to make room for the artwork inside. I love how it has a bit of a monochromatic and airy look, will definitely go with any kind of paint color or decor that we have in the room it hangs in. 

We opened our gifts first thing in the morning, which is why I'm looking a little sleepy and wearing an always flattering Seattle Mariners t-shirt.
I was so shocked to open it and love it like crazy. I can't wait to hang it up in our bedroom with some wedding photos. I still can't believe we've already been married for almost 2 years, it definitely doesn't seem that long! 

My favourite part of making crafts for each other was probably the fact that none of our rooms have doors right now, so we worked in opposite corners of the house with Christmas music blasting so we couldn't accidentally hear any hints. 

Anyone else make a creative Christmas gift or get surprised by their spouse? Almost done with Christmas posts a week into 2013, on Monday I'll share one other quick anyone-can-do craft that might help with cleaning up your Christmas decorations a bit, and then on to 2013! Make sure to vote in this weeks poll on the Facebook page and on Tuesday you'll hear about our resolutions! Have a great weekend!

Thursday 3 January 2013

DIY Gift: Date Jar

As hinted in yesterday's post, we added a little DIY flavor to our Christmas gifts to each other this year. My homemade gift for Philip was the Pinterest-famous Date Jar. The first place I saw them was here


Life in the Green House Date Jar Inspiration
This was a pretty elementary craft, finished in a couple of hours, minus the time I had spent thinking up date ideas throughout the week before which was more scattered and not really dedicated time. 

I started out getting a jar from my mom's house. I cut out a piece of paper for the top to cover the expiry date (popsicle sticks with words on them don't expire - fancy that). On the paper I wrote what the different colored sticks would mean. 

After shopping with the intention of buying popsicle sticks and paint, I could only find already colored popsicle sticks which actually saved a lot of time. I used blue for Winter dates, yellow for Summer, and green for anytime. Then I painted the tips of any dates that cost money with white. This way when we go to pick we can pick something more specific to what we're wanting to do that day. 

Date Night Examples:


  • Movie Night: His Choice
  • Go to a restaurant we've never been to
  • Make a craft together
  • Make dinner together
  • Pick out a 5 dollar item each from Superstore to make a surprise date night
  • Build a snowman


Philip appreciated the thought that went into it, and it was fun and easy to make. It will hopefully also save us some time every time we want to have a date night and don't have any ideas. 


I have some pictures of it, but for some reason my iPhone decided to crash today...not too sure what will happen with that. Hopefully we can get it up and running tonight and it doesn't cost a fortune. I will add some real pictures tomorrow hopefully, but until then, this I-can't-believe-it's-not-a-photograph illustration should tide you over.


Update: Phone randomly fixed itself, so here's some photos!


Finished date jar!


60 popsicle stick date ideas!


Also be sure to head to the Facebook page and answer our weekly poll! We want to hear all about your New Years Resolutions or plans for 2013, and we'll share ours as well next week. 

Wednesday 2 January 2013

Christmas 2012: In Review

We had a great holiday, and now we're back Monday-Friday at Grandpa Joe's House. Before we get back into the swing of things with home renovation projects, we thought we'd give you a rundown of our Christmas break. 

Most ominous performance: Philip spent a large portion of his vacation working on the drama for our church which he directed and also performed in as the never-once-seen Director (it was a play-within-a-play) whose voice creepily booms throughout the sanctuary. He's now frantically working on the upcoming Valentine's dinner theater (mark your calendars!) and we'll see if we get to see him this time.


Jokes that live forever in our mammaries: The theme that quickly emerged as the gifts on Christmas eve were unwrapped was anatomy as I received some huge jugs (green in color) and some cute little hooters (white ceramic owls) for Christmas.


Our First Christmas Tree/Decorations: Although this was our second married Christmas, our house allowed us to bust out some more decorations than the condo did, so we improved from some ornaments hanging in our condo window to a real tree and even some additional decking of halls.


I love our versatile Ikea tree decor, and how it goes with my homemade pine cones along with a little  Russian ceramic rabbit from Philip's Oma and a classy polar bear ornament from my mom.

Thrifty Shopping: We set a budget of $30 for each other's gifts (in past years we've definitely spent well over $100 so this was tight), and were pleasantly surprised to see how creative we could get. Philip bought me a top to go with some leggings I got from my mom, a Wii game that simulates...wait for it...The Bachelor! (My avatar is already engaged to Jason Meznik, but I can still win those other Bachelors' hearts.) He also made me something that we'll share sometime soon! As for what I got him, I also made something, got him a shirt, some dominoes for playing Mexican Train (we're getting old, people!), an ornament for our tree, and a Christmas pancake pan. I think we did pretty well!


No words can describe how stupidly addicting this game is.


Most Epic Adventure While Sitting on a Couch: One activity that really lived up to the relaxation we hoped for over our break was watching all three Lord of the Rings movies with Philip's brother and his wife. I'm not sure if I'm a total fan of the franchise yet... but it was worth watching. Definitely long though.


One of three movies watched over the break.


Just When You Thought It Was Safe to Go Back to IKEA: We hoped to get further on our bathroom reno than our break ultimately allowed, but we did make a trip to IKEA and ponied up for some bathroom cabinetry and fixtures that we'll talk more about soon!

I think that gives a pretty decent glimpse into how we spent the last week. There was a lot of couch potato behaviour, some crafting, a few shopping trips, and lots of family bonding. Now we're back on track and ready to share with you some of the renovations we've been working on. Hope everyone had a great Christmas and even though most people had to go back to work today, it can be nice to get back into routine and get productive again. 


What did you do over Christmas? Anyone else turn beautifully innocent gifts into something else with a gutter-visiting mind? Watch twelve hours of movies?


Also, just to be different, I just shared a question on the Grandpa Joe's House Facebook page in lieu of the typical blog poll. We'll try out that way of doing things for a week and decide what we like better. Head on over and vote in this week's resolution related poll.